Friends, we continue to build our WordPress site on our own. When we started talking about plugins, we realized that working with WooCommerce is quite a broad topic, and a few paragraphs here would not suffice. So, here is a guide to setting up a store on WordPress in WooCommerce.
Working with WooCommerce is quite a broad topic, and a few paragraphs here would not suffice. So, here is a guide to setting up a store on WordPress in WooCommerce.
How to add products to an online store?
In the side menu of the console, find the section “Products” ⇒ “Create product.”
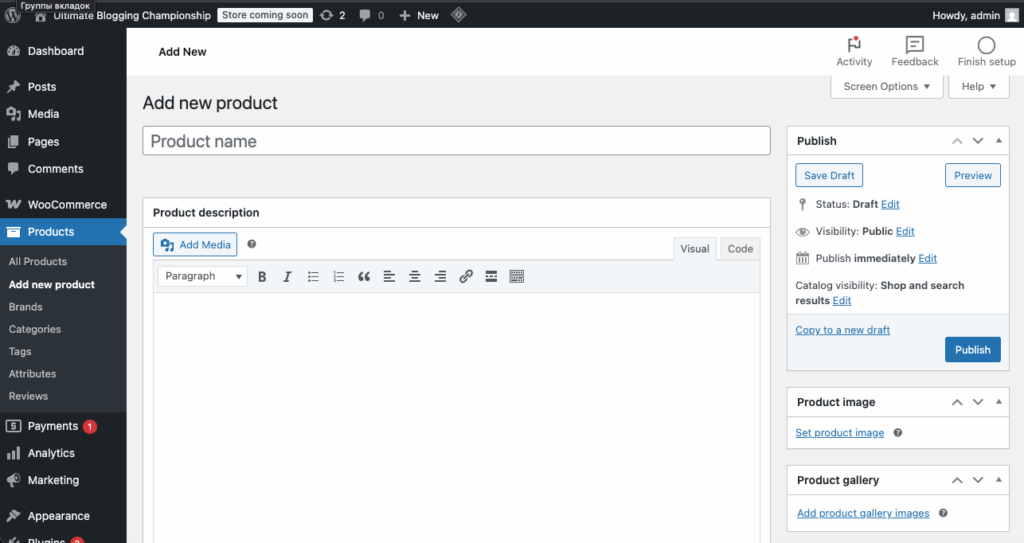
Fill out the product card. What do you need to do?
1. Add a title (product name)
2. Change the link. A URL will appear under the title, consisting of the domain, category, and name. If the title is in Cyrillic, as in our case, we recommend writing this part of the permanent link in Latin. To do this, click the “Edit” button next to the URL.

3. Enter a text description of the product and upload additional images to the “Product description” block.
4. Add a short description in the last block. The main requirements for it are uniqueness and conciseness. You can describe the characteristics in more detail in the previous block with the description.
5. You can upload the main image for the product in the panel on the right in the “Product image” block. The format is JPEG, maximum size is 300 MB. Additional images in the form of thumbnails are uploaded through the “Product Gallery” block.
6. Fill in the data.
Information included in “Product Data”
General: regular price and, if you plan to offer a discount, the discounted price (the regular price will also be displayed, but automatically crossed out);
Availability: unique ID for accounting (item number), available/out of stock (set manually), possibility to reserve and sell no more than 1 unit;
Delivery: dimensions, delivery class (required for free delivery or delivery at an increased price);
Related products: similar or recommended items at the order stage (the “Product Offer” field), additional products advertised in the cart (the “Related Products” field);
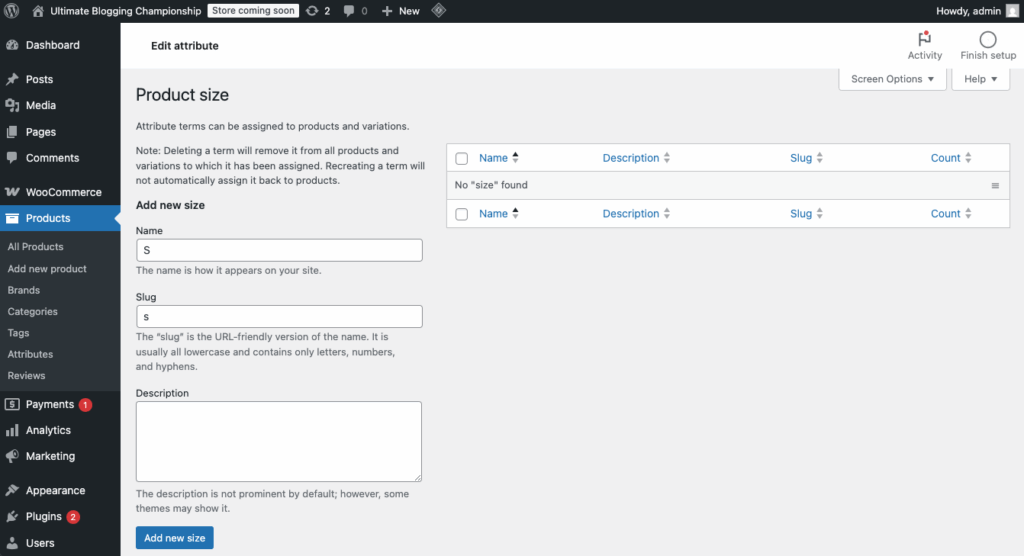
Attributes: additional values (color, size) for each product. You can create attributes through the “Products” ⇒ ‘Attributes’ ⇒ “Add attribute” button ⇒ “Value settings” in the table on the right. It is better to fill in the “Part of link” field with Latin characters.

Then, for each value, specify the name, part of the URL, and, if desired, a description.
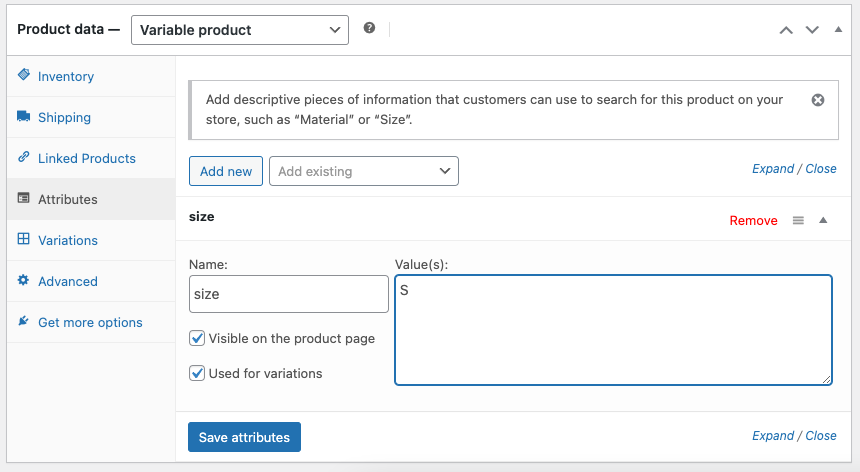
You can enter attributes for a product in the product data — at the top, select “Variable product” ⇒ select the attribute, for example, “Size” ⇒ click on the ‘Add’ button ⇒ enter the desired value ⇒ check the boxes next to “Use for variations” and “Visibility on product page” ⇒ “Save attributes.”
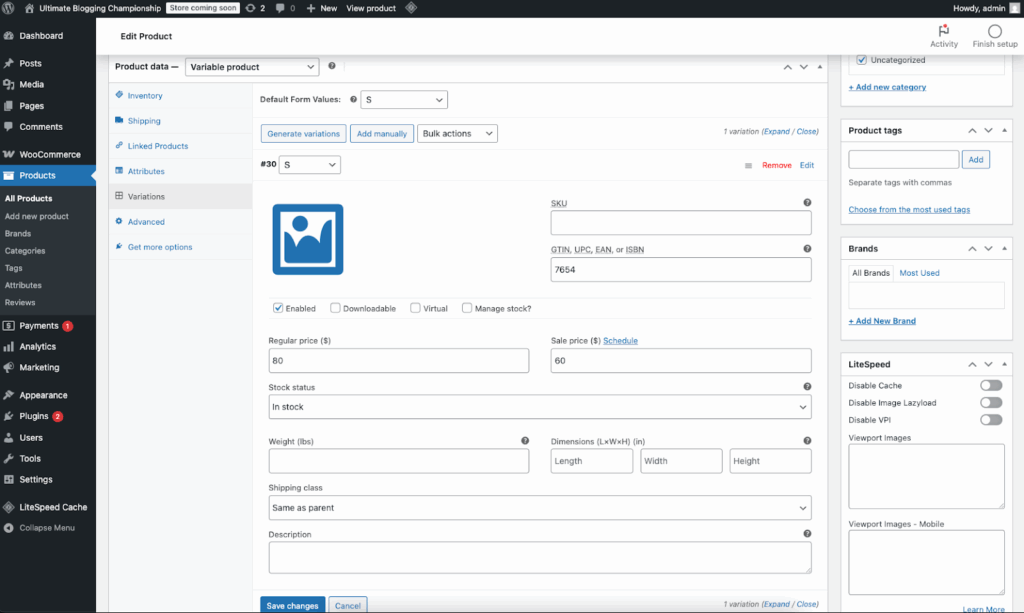
Then, in the “Variations” block, select “Create variations from all attributes” ⇒ ‘Go’ and fill in the required fields ⇒ click the “Save changes” button.
Important note: you must specify the price for each variation, otherwise the product with this attribute will be displayed on the website as “Out of stock.”
Additionally: purchase note (the text of the notification that the customer will receive upon successful order); menu order (the order in which the product will be placed in the catalog).
Enable reviews: permission to leave comments on the product and give it a rating. Please note that each new review will have to be approved manually via “Comments.”
7. Finish by clicking “Publish” in the side menu on the right.
How to work with orders in WooCommerce?
As soon as a customer orders a product on your website, the request will be sent to the “Orders” block in the “WooCommerce” section. When you click on it, you will see all the details, including contact information, payment type, delivery, and status:
- “Awaiting payment”— order received, not paid;
- “On hold” – the product is reserved in stock, but payment has not yet been received, confirmation is pending;
- “Failed” – the payment did not go through or was declined (unpaid), or requires authentication. Please note that this status may not be displayed immediately; instead, “Awaiting confirmation” is sometimes displayed;
- “In progress” – payment received, inventory reduced; order awaiting fulfillment;
- “Completed” – order fulfilled and completed, no further action required;
- “Cancelled” – cancelled by the administrator or customer: stock increased, no further action required;
- “Returned” – refunded by the administrator, no further action required.
A nuance with changing the order status – this process is not automated, so after receiving payment, you will have to change the order status manually.
You will also see a block with notes on the right. You can make a “Private note” purely for yourself and a “Note for the buyer” (for example, the invoice number), which they will receive by email.
What other useful blocks are there in the WooCommerce section?
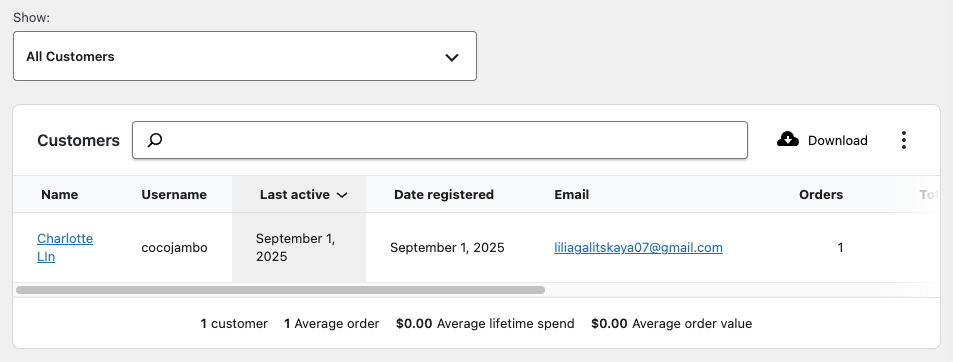
Buyers
In the “Buyers” block of the “WooCommerce” section, you can see a table with customers. You can also check how much revenue you have received from each of them.
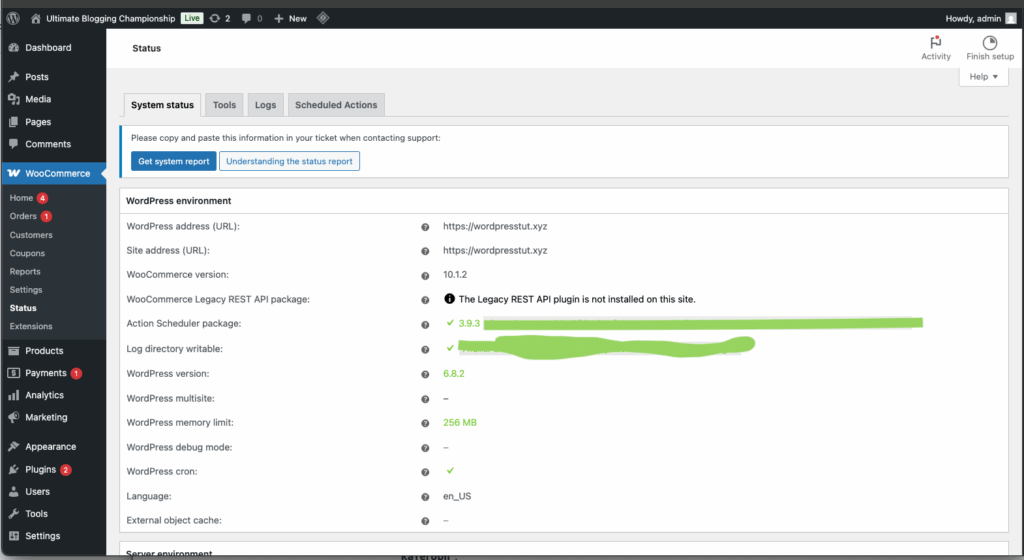
Status
If something unexpected happens and your site goes down, you can restore your previous settings through the “Status” block.
How do I create a category for a product?
Category management in WooCommerce is done through the “Categories” block in the “Products” section.
After installing WooCommerce, you will already have one default category called “Uncategorized.”
To add a new category, fill in the required fields on the left side of the screen: name ⇒ part of the link (in Latin characters) ⇒ in the “Parent category” field, leave the selection “None,” but if you are creating a subcategory, you need to specify a parent category for it ⇒ description (optional) ⇒ select the display type on the category page ⇒ set the image that will be displayed for this category ⇒ click “Add New Category”.
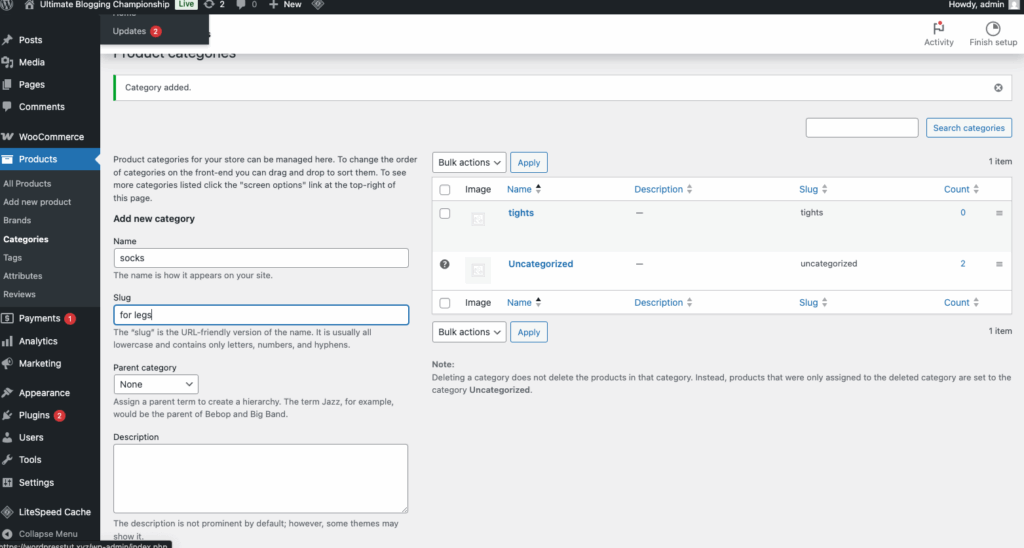
On the right, the entire list of categories will be displayed on the right side of the table. The “question mark in a circle” will indicate the default category. You can change it by moving the cursor over the desired category and clicking “Set as default”.
How do I create a label for products?
Tags, like categories, are created to link products to each other. The main difference is that there is no hierarchy for tags.
For example, if you are planning to sell clothing and you have a lot of leather products, you can create a separate label for such products, and even add it to the menu or sidebar if necessary. The process of creating tags is no different from creating categories, but everything happens in the Tags section. Fill in the name ⇒ part of the link ⇒ description (optional) ⇒ “Add new tag” button. All created tags will be displayed in the table on the left.
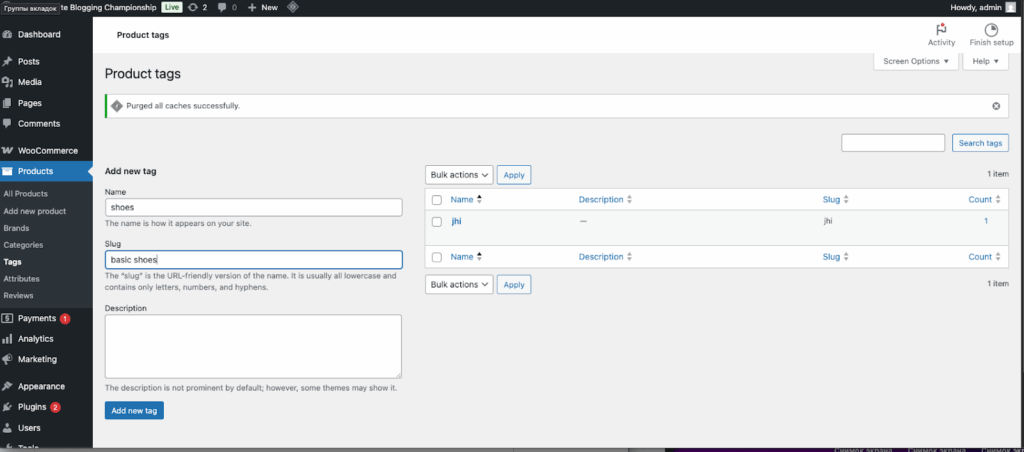
To assign a tag to products, you need to return to the individual product settings and select the desired tag in the “Product tags” block.
How to allow/deny leaving reviews?
All work with reviews is configured in the section “WooCommerce” ⇒ ‘Settings’ ⇒ “Products” tab. At the very bottom, there will be a block with the reviews settings. By default, they are enabled, but you can disable them by unchecking the “Enable product reviews” box.
You can also allow only those people who have already purchased a product from you to leave reviews, enable a rating in reviews, and determine whether it is mandatory.
How do I manage my inventory?
General inventory settings can be configured in WooCommerce ⇒ Settings ⇒ Products tab ⇒ Availability tab. To start the detailed settings, check the box next to “Enable product-level inventory management”.
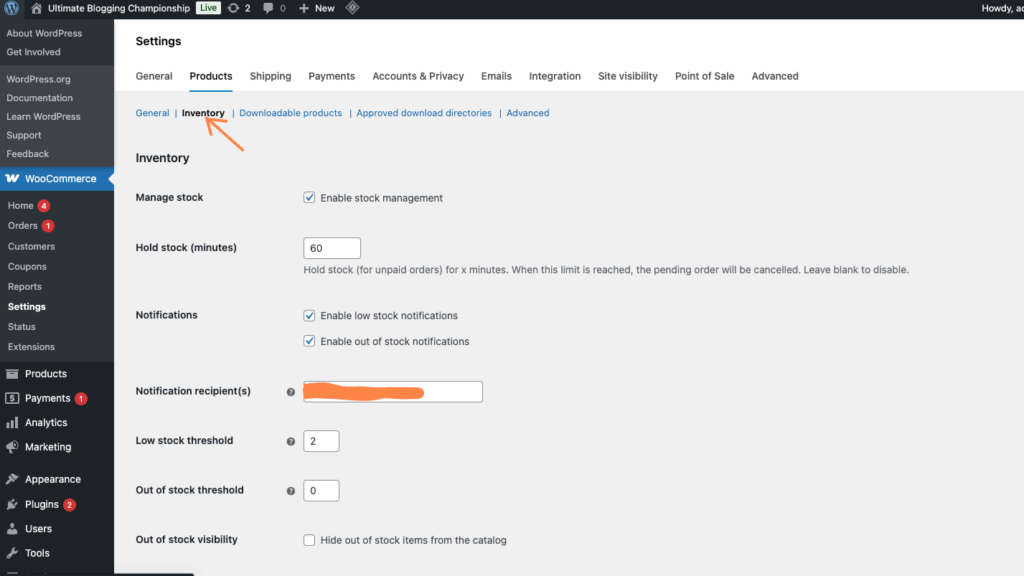
If you plan to hold stock for unpaid orders for some time, specify this value in the “Stock Hold (min)” field. The default value is 60 minutes. If you leave the field blank, this function will not be available.
In the “Notifications” block, you can enable or disable notifications about low stocks and stock expiration. These notifications will be sent to the email you specify in the Notification recipients field. You can specify several recipients by separating them with a comma.
Below you can define the stock threshold at which these notifications will be sent.
You can also hide out-of-stock items from the catalog and display the number of items in stock in 3 formats:
- “10 left”
- “Only 1 left” for low stocks
- “Don’t show the number of leftovers at all”
How to set up delivery?
Delivery zones
First, let’s figure out the delivery zones. To do this, go to WooCommerce ⇒ Settings ⇒ Products tab ⇒ Shipping tab ⇒ Shipping Zones ⇒ Add new or Edit existing by hovering over the zone.
What do you need to do at this stage?
- Name the zone, for example, “The USA”.
- Specify the regions, for example, if you have chosen United States as a zone, specify the regions. It is also possible to limit the region to a postal code.
- Next is the “Delivery methods” block, in which we can choose 3 options:
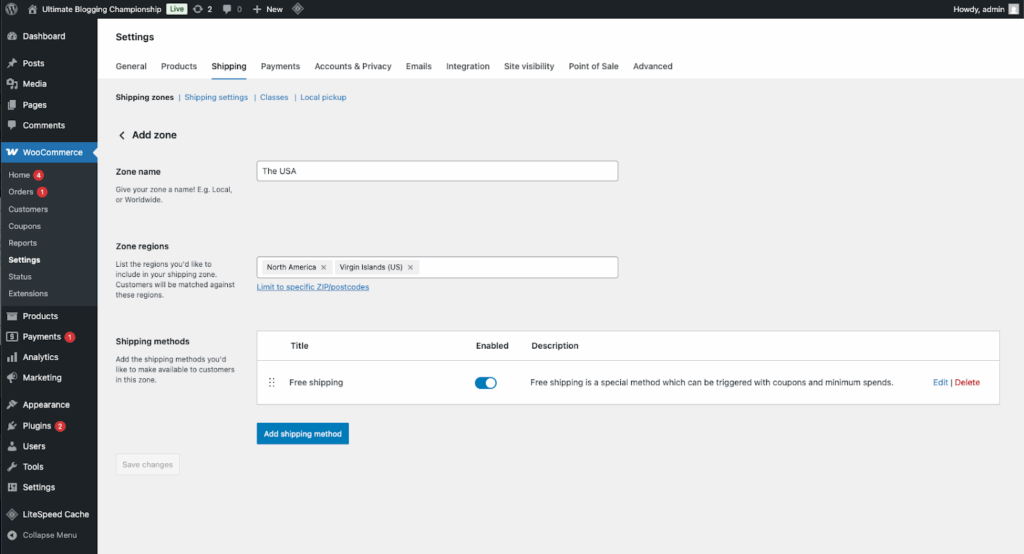
Free shipping – for this option, you can choose a minimum order amount or a special coupon. To set these values, hover over “Free Shipping” and click “Edit”. If necessary, you can disable this delivery method.
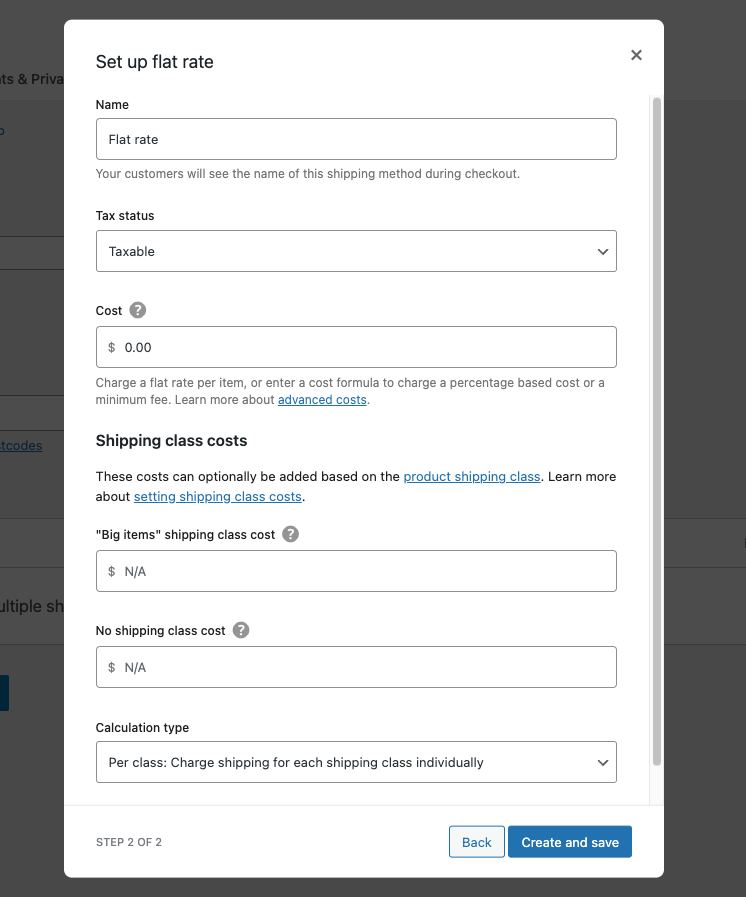
Flat rate – allows you to set a fixed amount for delivery. In the editing mode of this payment method, you can also specify the status of the delivery tax and, in fact, the delivery cost itself.
Pickup – allows your customers to pick up the goods themselves. By default, basic taxes will be charged regardless of the buyer’s address.
Delivery options
In this tab, you can make the following settings:
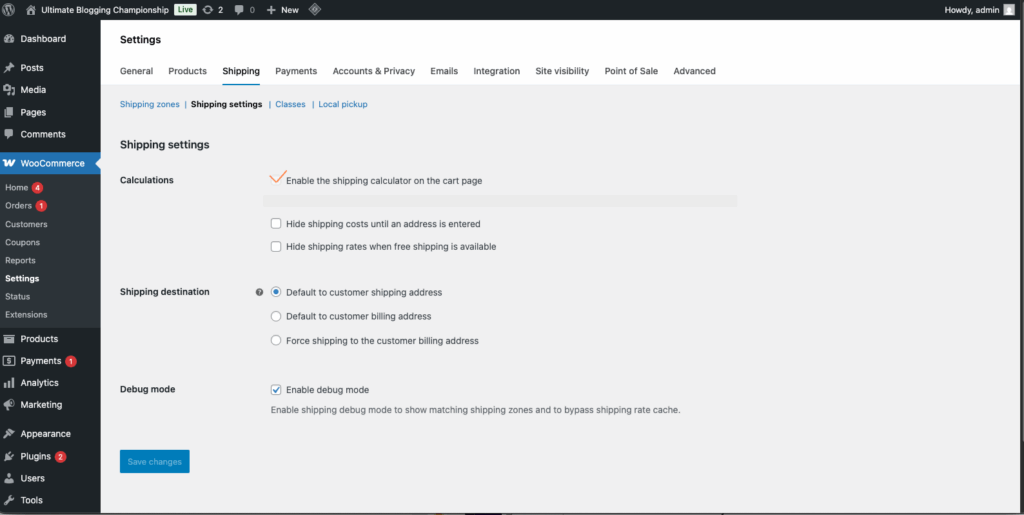
- Show shipping calculator on the cart page or hide shipping costs until the customer enters the address;
- Delivery destination – for the customer to receive the goods at the selected address, you can choose the first two options, when you select “Forced delivery to the buyer’s billing address” the goods will be sent exclusively to the address that he entered when creating an account;
- Debugging mode – this mode allows you to disable the delivery cache, with it you can immediately p After checking, you can turn off the debugging mode.
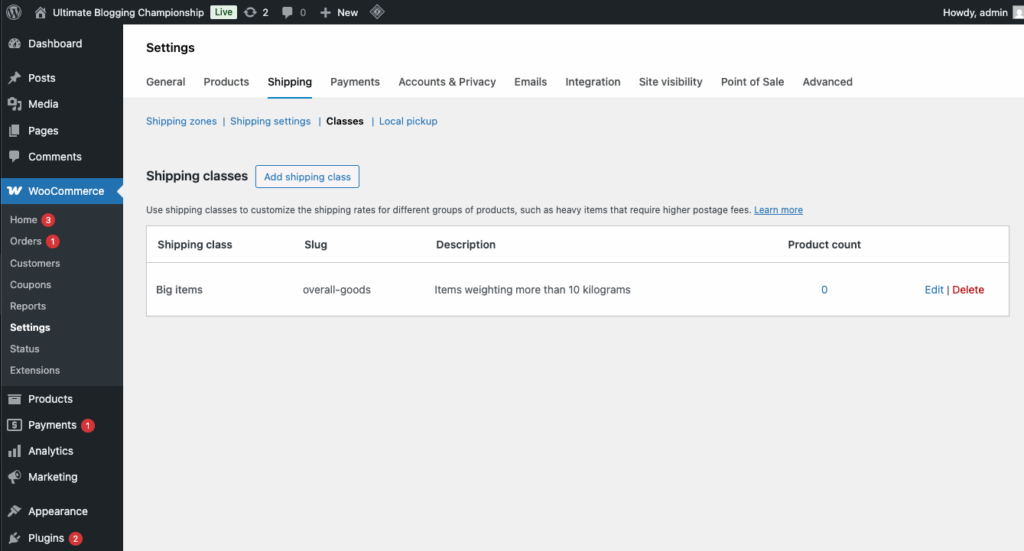
Shipping classes
Shipping classes should be added in cases where you need to provide different shipping prices for certain types of goods (for example, customers may pay more for oversized goods). To create a new class, click on the “Add shipping class” button on the right in the table. Fill in the required fields (name, part of the link in Latin, description) and click on “Save changes”.
To change the price for goods of a certain class, go back to editing “Delivery zones” ⇒ “Single rate” ⇒ set the value in the “Cost” field to ‘0’ ⇒ and in the line “Not set cost of delivery class” indicate the value that was in the “Cost” field. This is necessary so that the total cost of delivery does not add up to the cost of the class.
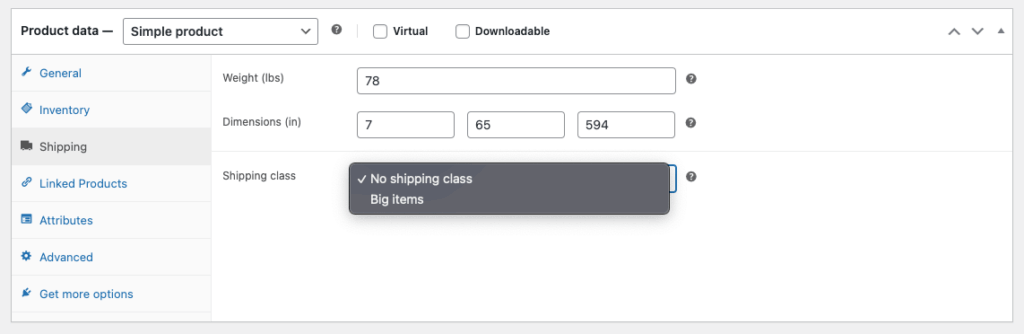
Now we need to assign the created classes to the defined products. To do this, go to the “Products” section ⇒ click on “Edit” in the field of a specific product ⇒ ‘Shipping’ ⇒ “Shipping class” (only one class can be selected for each product) ⇒ Update the product so that the changes are saved.
If you need to assign the created class to several products at once, check the boxes next to the required products ⇒ in “Group Actions” select ‘Edit’ ⇒ “Apply” ⇒ from the drop-down menu select the shipping class ⇒ Save changes.
Shipping plugins
If you plan to send goods via shipping, you can just install shipping plugins. But if you want to deliver your goods to other states, delivery tariffs will differ, you should integrate with USPS, UPS or any other shipping company. How do I set up payments in WooCommerce?
How to set up payments in WooCommerce?
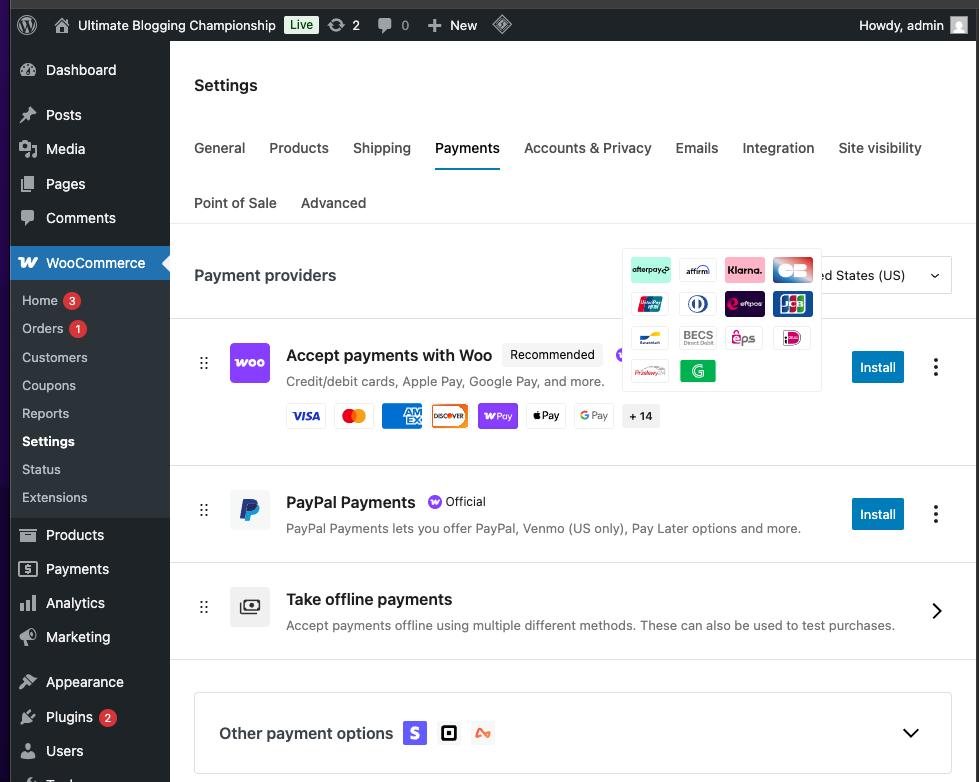
Payments on your WordPress site can be set up in the “WooCommerce” section ⇒ “Payments” tab
Important nuance: in order for your customers to make a payment by card, you need to connect a payment gateway plugin, such as LiqPay or Intercash
When you install one of these plugins, a special module will be displayed in the side menu of the WordPress console, through which you will be able to set up an additional payment method.
WooCommerce offers three payment methods by default (direct bank transfer, payment by check – both of which are not relevant for our region – and cash on delivery, plus it separately recommends the PayPal payment system for receiving payments.
Cash on delivery is an option to pay for your order when you receive the goods. In the settings you need:
- Check the box “Enable payment on receipt”;
- Enter the title and description of this payment method – they will be displayed to the buyer when placing the order.
- The text from the “Instructions” will go to the “Thank you for your order” page.
- In the “Enable for delivery methods” block, select the types of shipments for which cash on delivery will be valid.
- Save changes by clicking on the button at the bottom of the page.
How to change the currency in WooCommerce?
You can set up the currency in the section “WooCommerce” ⇒ ‘General’ tab ⇒ block at the very bottom of the page called “Currency Settings”.
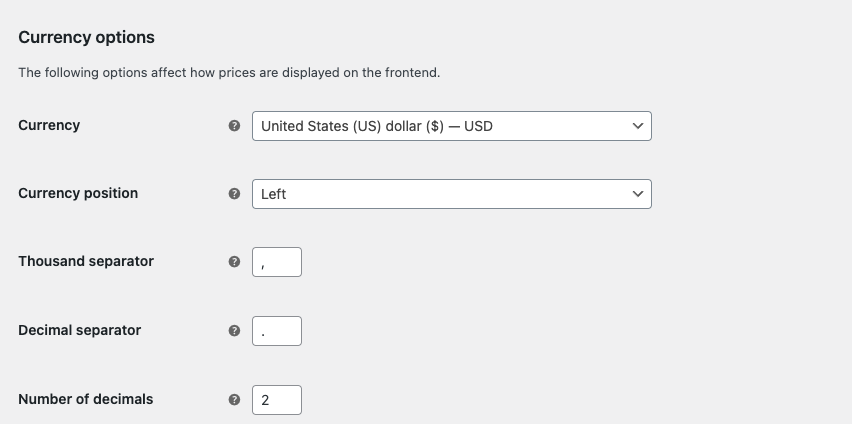
If you specified the region “The USA” during the initial settings, the currency “USD” will be set by default. You can also determine the location of the currency sign (right with a space, left with a space, left or right). You can also set the thousands separator (,), decimal separator, and the number of decimal places. Don’t forget to save changes☝️
In conclusion
The WooCommerce Manual is complete. Your store is ready for gradual growth, and WooCommerce will be there for you in case you need to change the settings.
Now we can go back to our guide “How to create a WordPress website” and find out what other plugins are needed for our site at the first stage of its life.