- Why is it better to transfer a website from Wix?
- Why should you transfer your website to WordPress?
- How to transfer a website from Wix to WordPress?
- In conclusion
When you are just starting to build your website, Wix really comes in handy because it takes care of almost all the technical aspects. However, when you start to delve deeper into the process (you need a form, online chat, or email marketing), you may find that the functionality and flexibility of the website builder is not enough.
In such cases, CMS (content management systems) come to the rescue, primarily WordPress, which are already used by 59.9% of websites with a CMS system (that’s 42.7% of all websites, by the way) according to W3techs research
| CMS | Share of All Websites | Share of CMS Market |
| WordPress | 42.7% | 59.9% |
| Shopify | 5.1% | 7.2% |
| Wix | 4.2% | 6.0% |
| Squarespace | 2.5% | 3.4% |
| Joomla | 1.3% | 1.8% |
| Other CMS | 7.0% | 10.1% |
| None | 28.8% |
Why is it better to migrate a website from Wix?
When comparing Wix and WordPress, it is important to note that neither platform is better than the other — they simply represent two completely different approaches to website creation and management.
Wix is a website builder that offers tools for quickly creating websites: 800+ templates, the ability to add video backgrounds, scrolling effects, and animations to make pages interactive. At the same time, Wix, like any website builder, has a number of limitations.
It is not possible to add forms to blog posts. Of course, there is a workaround for this—create a new page, place the form on it, and then insert a link to this page in the blog text. But this means that users have to go somewhere else just to fill out a form that you need more than they do. This is extremely inconvenient if you plan to use such forms to collect information about your target audience or to get subscriptions.
The website template cannot be changed after publication. Once and for all 🙂 If you have already chosen a template for your website, know that it will stay with you forever once you publish it.
Only Wix tools are allowed. Since Wix is a closed platform, you can only use a limited pool of tools. As your website grows, these may not be enough.
You cannot access or change your site’s HTML. Currently, Wix users do not have the ability to access their site’s HTML. However, there is Velo, an open development platform from Wix, which allows you to add several additional features to the Wix editor, such as database collection.
If you have a starter plan, third-party ads will be displayed on your website. If you’re going to have ads, they should be ones that benefit your website. It’s not a given that third-party ads will be well received by visitors. If you’re on a starter plan, you’ll have to upgrade to a more expensive one to get rid of third-party ads on your website.
A question about SEO. Yes, with Wix you can optimize content, but usually these methods are a little behind the times. If you are counting on the long term and reaching the top of search results, it is better to look towards CMS.
Indeed, with a CMS, you can get complete freedom and flexibility in creating posts, installing the necessary plugins, customizing the design with hundreds of free and premium themes, and much more.
Why should you migrate your website to WordPress?
Flexibility
Let’s say you started with Wix, but over time your website and audience have grown, and you now have new tasks: a readable blog, tools for optimizing content for search engines, or a complete rebranding of your website. Any content management system can handle all of this well.
However, you will have to pay for the flexibility of a CMS with more time and effort to set up your website on WordPress: you will need to connect your own domain, choose a hosting provider, and download the software. A good provider will, of course, simplify these processes as much as possible:
- Domains in most zones can be registered in a few minutes, and they will always help with the transfer.
- Technical support specialists will select a WordPress hosting plan for you based on your resources.
- You can install the latest version of the CMS directly from the cPanel control panel using a special tool called Softaculous.
Independence
Since WordPress is an open source content management system, you don’t have to wait for the changes that the developers of the constructor plan to release. You can install or remove the theme or plugin you need at any time.
Uniqueness
It is quite unlikely that you will be able to create a decent design for a niche website using a website builder. The same applies to websites in popular niches—to stand out from your competitors, you need to have at least a unique design that visually reflects your brand’s voice.
Security
A secure website rests on three pillars: SSL certificate, DDoS protection, and antivirus. While Wix is ready to provide you with the first one, the next two are usually handled by the provider from whom you purchase WordPress hosting.
How to transfer a website from Wix to WordPress?
There are two main ways to convert a project from Wix to a WordPress site: migration using an RSS feed and a special plugin. Let’s take a step-by-step look.
Step 1. Choose a hosting provider
Before you start exporting content from Wix, you need a place to import it. That makes sense. The answer to the question “where?” is provided by the hosting provider.
It is better to choose one that offers you specialized WordPress hosting with auto-installation, built-in DDoS protection, and antivirus.
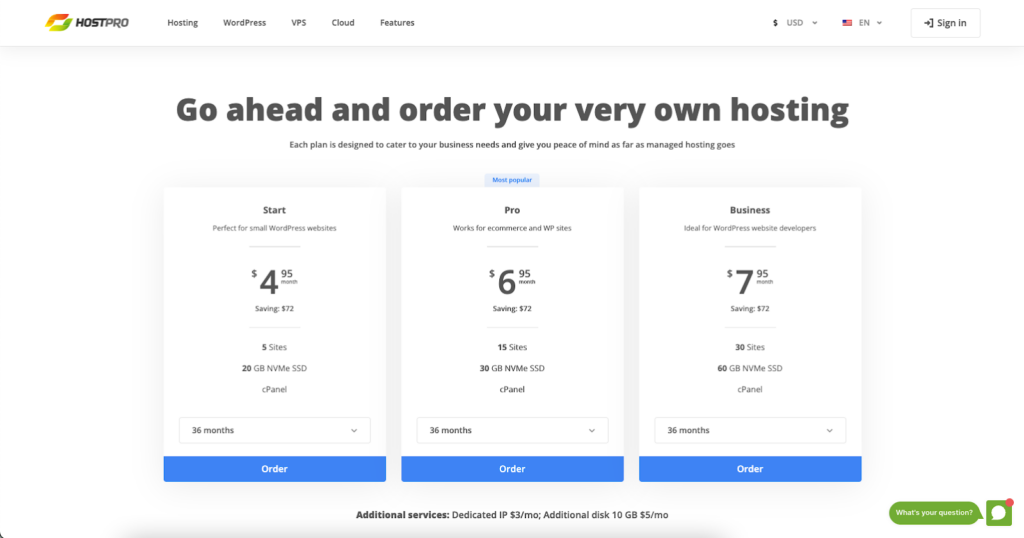
Technical support also plays an important role. It will make the necessary backups for you, update the theme and plugins if necessary, and scan the site for vulnerabilities. You can also use technical support services when choosing the right tariff.
This will allow you to focus on the non-technical aspects of the site, such as content creation and attractive design.
Step 2. Setting up your website on WordPress
Step 2.1. Installing WordPress
You can do this with just one click in your cPanel control panel in the “Softaculous Apps Installer” section.
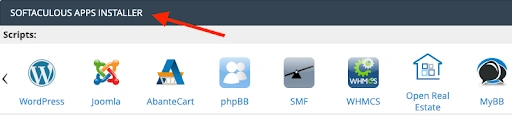
Or you can do it right away in the second step of ordering WordPress Hosting.
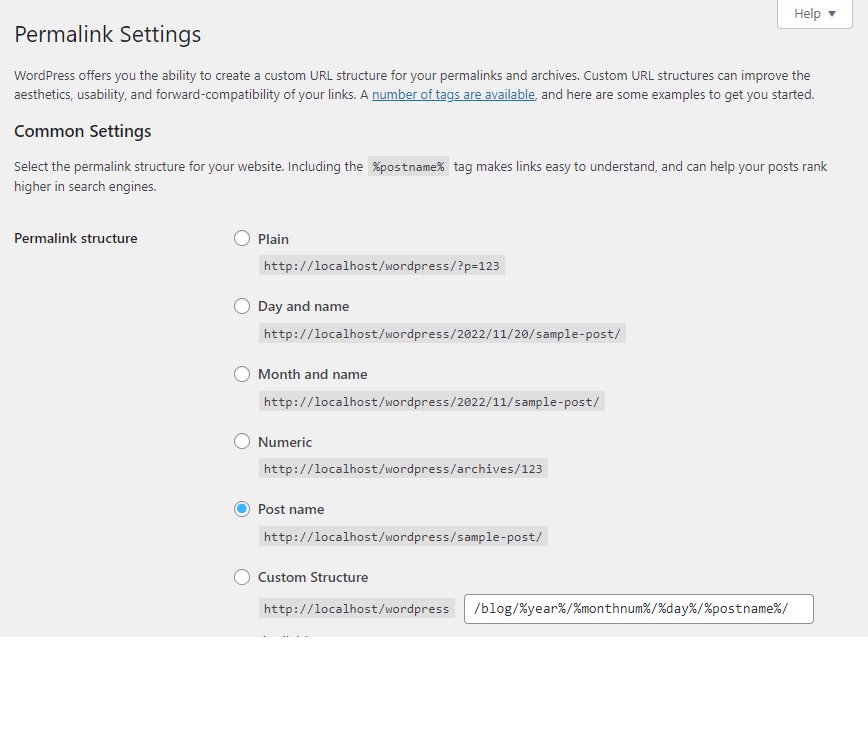
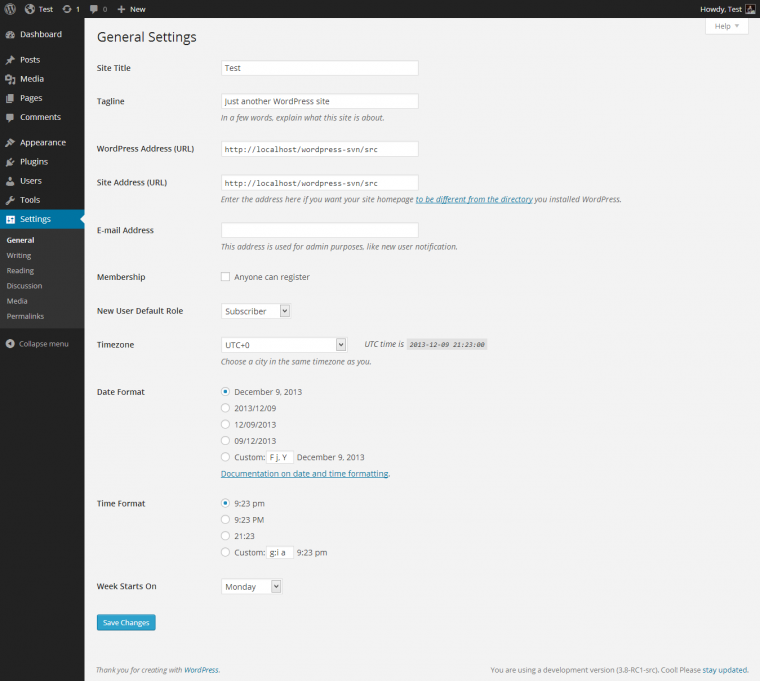
Step 2.2. Changing the URL and name of the website
In the WordPress console, find the section “Settings” → “Permalink Settings” → “Post Name.” Make your URL visually appealing and readable.
In the “General” section, you can change the “Site Title” and description (“Key Phrase”) to those that already exist on your existing site.
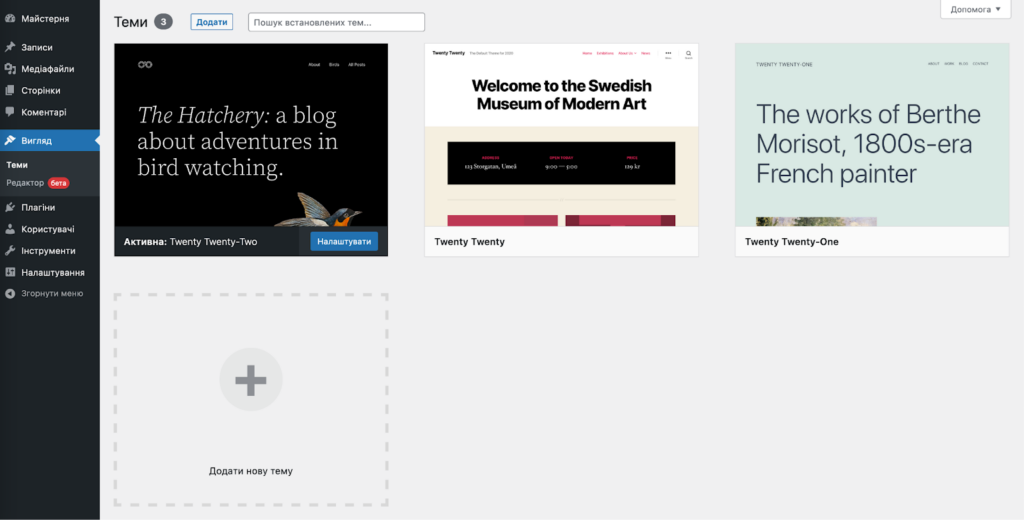
Step 2.3. Install a theme
Yes, you can transfer pages, posts, and content from Wix, but Wix templates are not usually imported to your new WordPress site. So, find and install a theme from the WordPress directory (Appearance → Themes → Add New).
Step 3. Transfer content
There are two ways to export your site from Wix: using an RSS feed or a special CMS2CMS plugin. Let’s start with the first option.
Exporting a website using an RSS feed
This method is only suitable for older versions of Wix and only for small websites like small blogs with less than 20 pages, so if you created your website using the builder recently, it is better to proceed directly to the second migration method.
The RSS process is actually semi-automatic — you will have to transfer pages and images manually, because RSS has recently been reserved for blogs (posts) only.
1. Find the RSS feed
To do this, add “/feed” or “/feed.xml” to your website’s URL.

2. Save the RSS file
With the RSS feed open, right-click on the page and select “Save as.” Save it with the .txt extension.
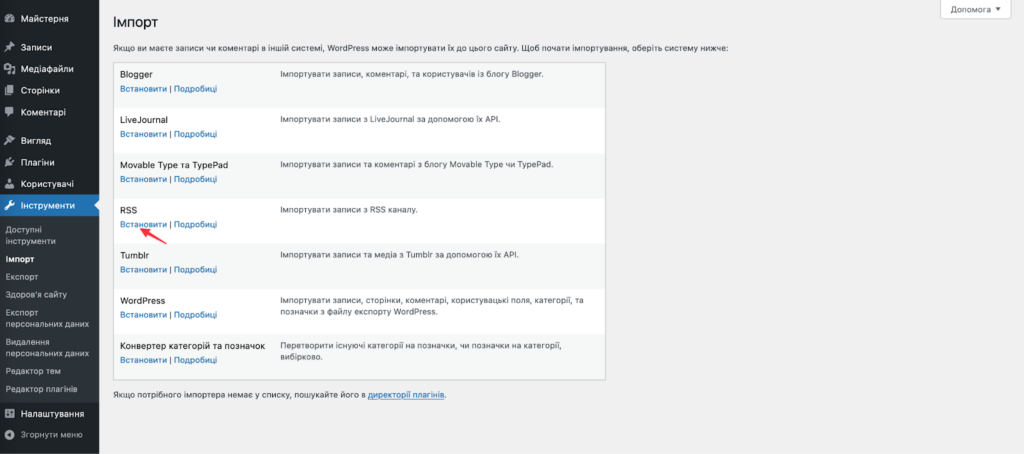
3. Import the file into WordPress
Return to the WordPress console → “Tools” section → “Import” → RSS Install → Start import → Download and import the file.
Check that all your posts have been imported correctly. Go to the “Posts” section → “All posts”.
RSS feeds will transfer without any problems, but pages are not so simple.
4. Add website pages to WordPress
The good old copy-paste will help — copy the page content from Wix → find the “Pages” → “Add New” section in the WordPress console.
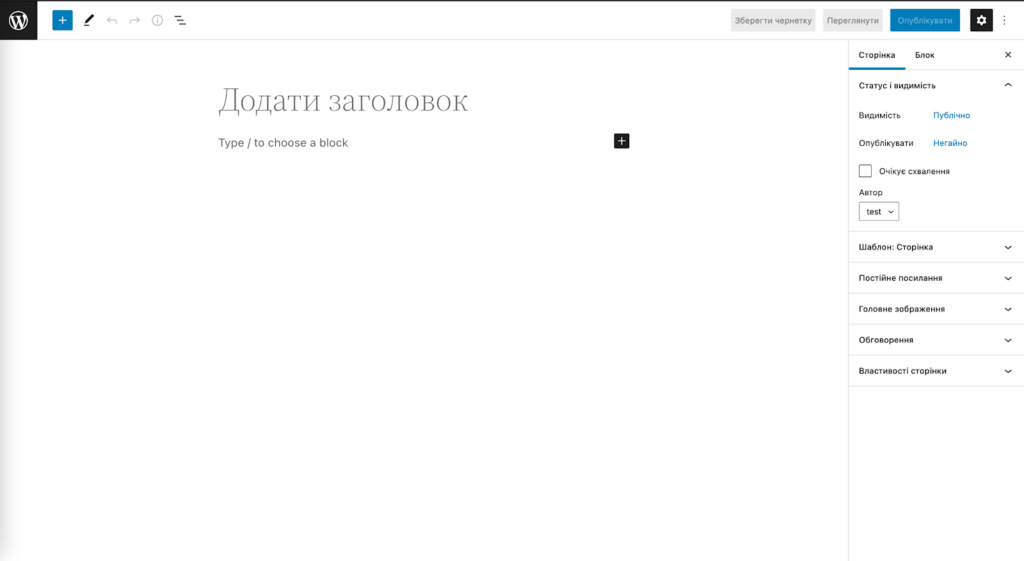
And paste the content for each block of each individual page.
5. Transferring visuals
Once we have dealt with transferring text content, the question of images arises. There are two ways to solve this:
Option 1 – first download each image to your desktop, and then from there to WordPress via “Media Files” → Add New.
Option 2 – install and activate the Import External Images plugin, which will download your images from Wix and copy them to the new site, replacing the links with new ones.
After activating the plugin, go to “Media Files” → Import Images Now.
Exporting a site using the CMS2CMS plugin
For greater automation, you can use the paid CMS2CMS plugin. Its cost is not fixed and varies depending on the amount and type of material. For example, transferring 50 pages and 50 posts can cost $57.
1. Install the plugin
In the console menu, select “Plugins” → Add New → Find “CMS2CMS: Automated Wix to WordPress” → Install → Activate.
2. Create an account on CMS2CMS or log in to an existing one
Open the plugin settings → Wix to WordPress. Create a new account or log in to an existing one, if you have one.
3. Connect to your Wix website and start the migration
Enter your Wix website URL → Verify Connection. Then configure the migration process. Select the content you want to migrate to your new WordPress website.
If necessary, you can use add-ons (transfer of metadata, images, and 301 redirects), of course, for an additional fee.
After that, click on “Start Free Demo Migration” and you will see a report with errors, if any occurred during the transfer process, and, of course, the cost of your migration. If you are satisfied with the price, click on “Complete Migration.” The transfer will be carried out after payment.
Step 4. Actions after migration
There are a few steps left before your WordPress site is ready.
1. Create a menu
To prevent your users from getting lost on your new WordPress site, you need a main menu. To do this, find the section “Appearance” → ‘Menu’ → “Create Menu” in the console → select the pages you need for navigation and click “Add to Menu” → after adding all the necessary items, click “Save Menu” at the bottom of the editing page.
To place the menu on the site, switch to the “Area Management” tab. Depending on the theme, you will be offered different placement options. If you need a menu at the top of the page, feel free to choose “Top Menu” or “Main Menu.”
2. Install a plugin for SEO
There are quite a few plugins for optimizing your content, the most famous of which is, of course, Yoast SEO. With it, you can tailor the content of your site to the key queries that future visitors are most likely to search for, and it also:
Allows you to edit snippets (to view and configure how your site description will appear in Google search results);
Analyzes the readability of your texts and gives advice on how to optimize them;
Connect your WordPress site to Google Search Console, allowing you to periodically check how your site is performing on search pages.
The plugin activation process is the same as with CMS2CMS. In the console menu, find “Plugins” → “Add New” → “Keyword – Yoast SEO” → ‘Install’ → “Activate.”
3. Transfer the domain
A quick note: if you used a free domain from Wix, you will simply need to purchase a new one from your provider.
If you have a custom domain on Wix, you can simply transfer it to a new host. Let’s find out how to do this using Hostpro as an example. In the main menu, find the “Domains” section → “Transfer Domain” tab.
On the page that opens, enter the domain and click “Order Now.”
In the next step, enter the transfer code and the Registrant contact code (if the domain is registered in the Ukrainian zone). You need to find out this code directly from your current registrar, i.e., Wix.
Please also note that when transferring many domain zones, the domain is automatically renewed for 12 months, so the transfer itself will be paid — the invoice is issued automatically after ordering. The transfer begins after payment is received.
If the transfer is free, the transfer process will start immediately after the order is completed. Then, a request is submitted to your current registrar and a letter is sent to the domain owner to confirm the transfer. Once the owner and former registrar confirm the transfer, your domain will begin to be serviced by the new host.
4. Check the website
Open your new WordPress website and check every post, every page, and every link. This may take more time than you would like, but you will be sure that your project is displayed correctly in your browser window.
In conclusion
We sincerely hope that our article will help you transition smoothly from Wix to WordPress and that you will gain more flexibility and freedom in developing your own website.We are also always happy to assist with transferring your domain, selecting the right specialized WordPress hosting plan, and resolving thousands of other technical issues.